Your website gives me 1016 lma0
“Now, create a Cloudflare account and add your site to it.”
This is where I am stuck. I’m at the “2) Review your DNS records” stage - but if I put in the CNAME records as described, I get a red error bar with DNS error 1004.
Any chance of padding out the “add your site to it” bit?
This article explains the general process more in-depth:
3 Likes
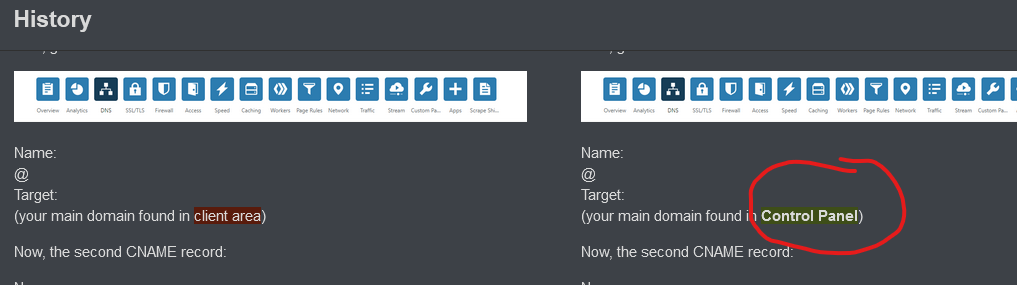
“main domain” (CNAME) is mentioned in this topic
and I think you misinterpreted it
The “main domain” we’re talking about here is the main domain of the hosting account. That’s an internal identifier for your hosting account and it should look like asdfasdf.epizy.com or another random 8 character subdomain.
4 Likes
The tutorial is old - so some locations are no longer current.
I edited it so it wouldn’t confuse someone else
5 Likes
the freenom page isnt loading at all? im clicking “check availability” but its not doing anything
edit: it worked after i waited 10 minutes
This tutorial is very old; Freenom doesn’t accept new registrations anymore, .ml and .ga are no longer controlled by them, and .cf and .gq are expected to follow as well, leaving only .tk that isn’t accepted on free hosting.
You can read more about that situation on the following topics:
7 Likes
So all domains who use it will get taken down soon?
Also didnt freenom get sued by Meta?
Also, if this doesnt work at all anymore, cant you add [OBSOLETE] at the start of the title?
And is there any other way to get a custom domain like this?
I think they will.
Yeah, it did.
Some moderator can do that as well, since the OP doesn’t have access or is inactive…
To get a free domain that is also supported by Cloudflare you could make do with EU.org or PP.UA, though they’re second-level and not top-level as opposed to Freenom, but they’re still compatible with any service that requires a valid domain and not a subdomain.
3 Likes
Good point. Added!
3 Likes
But arent those sub-domains?
These are subdomains that works like regular top level domains, as you can have custom nameservers for them.
4 Likes
Yes, but dont I have to abandon my already existing domain (belk.epizy.com) for the eu.org or PP.UA sub domains?
No. You can still use it ![]()
2 Likes
Yes but i cant use it for Cloudflare
You can’t use subdomains with cloudflare, yes.
But this doesn’t mean that you need to give it up. Just add a CNAME record to your new eu.org or pp.ua domain, pointing to your old belk.epizy.com . (Should work)
2 Likes
So i will be able to use CDN for my already existing domain?
No, only your new domains can be on cloudflare.
You might wanted to give up your old domain eventually. Anyways it was only a free subdomain that you can’t really control.
2 Likes